5 Best Bread Machines for Gluten-Free Bread (October 2026)
The best bread machines for gluten-free bread include the KBS Pro 2.2 lb Bread Maker for recipe adjustments, the Zojirushi Virtuoso Plus for regular family baking, and the Elite Gourmet 2 lb (Black) for smaller counters.
On this page (8 sections)
- Which bread machines work best for gluten-free bread?
- The best bread machine for gluten-free bread for each need
- How should you choose a gluten-free bread machine?
- Which flour and ingredients work for gluten-free machine bread?
- How do you set up your first gluten-free loaf?
- What common mistakes spoil gluten-free machine bread?
- How do you clean and store a gluten-free bread machine?
- Which bread machine should you buy for gluten-free bread?
The KBS Pro 2.2 lb Bread Maker is the best bread machine for gluten free bread for households that want flexible loaf sizes and custom baking controls. Choose the Zojirushi Virtuoso Plus for frequent family loaves or the Elite Gourmet 2 lb (Black) when counter space matters most.
The right machine should fit your recipe, your kitchen and the amount of bread you'll use. A gluten-free button helps, but the flour blend and ingredient balance still do much of the work.
For a closer look at the process, read whether you can make gluten-free bread in a bread machine. Our bread machine buying guide explains the wider choices around capacity, cycles and daily use.
Our picks at a glance
-
1

-
2

-
3

- 4
 Best for sandwich loaf householdsCheck it
- 5
 Check it
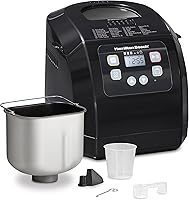
Hamilton Beach Digital Bread Maker
Best for nearby bakers
Which bread machines work best for gluten-free bread?
The KBS Pro leads for recipe flexibility, while the other picks address counter space, family baking, loaf shape and manual add-ins. All five include a gluten-free course, so the useful differences lie in how you'll use them.
PantryMemo compared their cycle options, controls, capacity and physical size. More programs or greater wattage don't automatically mean a better gluten-free loaf.
Use the comparison below to narrow your choices, then check the practical tradeoffs in each write-up. In particular, separate the machine's general loaf-size options from the settings its gluten-free course allows.
| Product | Best for | Programs | Loaf sizes | Pan | Our score |
|---|---|---|---|---|---|
| KBS Pro 2.2 lb Bread Maker | recipe adjustments | 17 automatic settings and 1 custom setting | 1 lb, 1.5 lb, 2.2 lb | Ceramic | 8.8 |
| Zojirushi Virtuoso Plus | regular family baking | 7 | 2 lb capacity | Removable nonstick | 8.7 |
| Elite Gourmet 2 lb (Black) | smaller counters | 19 | 1 lb, 1.5 lb, 2 lb | Nonstick | 8.4 |
| KBS Premium Convection 2.2 lb | sandwich loaf households | 17 | 1 lb, 1.5 lb, 2.2 lb | Ceramic | 8.2 |
| Hamilton Beach Digital Bread Maker | nearby bakers | Includes gluten-free, French and dough cycles | 1 lb, 1.5 lb, 2 lb | PFAS-free nonstick | 7.7 |
The best bread machine for gluten-free bread for each need
Choose by your main baking habit, rather than collecting features you may never use. A baker refining recipes needs different controls from someone repeating the same mix each week.
1. KBS Pro 2.2 lb Bread Maker for gluten-free bread adjustments
KBS Pro 2.2 lb Bread Maker: Best for recipe adjustments
- Dedicated gluten-free program
- 1 lb, 1.5 lb and 2.2 lb loaf sizes
- Custom baking time and temperature
- Ceramic pan and paddle
Choose this model if you want a gluten-free starting program plus control over baking time and temperature. Its loaf-size choices suit households that bake different amounts.
Pros
- Dedicated gluten-free cycle
- Three loaf sizes
- Custom baking time and temperature
Cons
- Custom controls take time to learn
- Automatic dispenser adds another part to clean
The KBS Pro is the strongest fit for bakers who want an automatic starting point and room to adjust the bake later. It combines 17 automatic settings with a custom setting that lets you change baking time and temperature.
Its general loaf options cover 1 lb, 1.5 lb and 2.2 lb. That range is useful when choosing recipes, but check the gluten-free course instructions before assuming every size can be selected within it.
The ceramic pan and paddle suit buyers who prefer that coating, while the automatic nut dispenser handles additions during the cycle. Start with a plain loaf before adding extras, so you can learn the recipe's normal texture and rise.
Buy this model if you expect to repeat a recipe, take notes and make small changes. Custom baking controls are most useful once you know what needs changing, such as a crust that needs more color.
Skip it if you want to avoid extra decisions and will use one fixed recipe. Also, don't mistake adjustable baking time and temperature for confirmed control over every mixing and rising stage.
The included 53-recipe book offers starting ideas, but select a recipe with clear gluten-free bread-machine directions. A broad recipe collection isn't a reason to substitute ingredients freely.
2. Zojirushi Virtuoso Plus for regular family loaves
Zojirushi Virtuoso Plus: Best for regular family baking
- Gluten-free course
- Double kneading blades
- Bottom and lid heaters
- 2 lb loaf capacity
A family-size loaf capacity, two kneading blades and bottom-and-lid heating suit frequent baking. Plan to give this heavy machine a permanent counter spot.
Pros
- Dedicated gluten-free course
- Double kneading blades
- Heaters in the bottom and lid
Cons
- 24 lb weight makes frequent moving awkward
- 18-inch width needs counter space
The Zojirushi Virtuoso Plus suits households that bake often and can leave the machine on the counter. Its 2 lb capacity fits family baking or a routine of slicing and freezing part of each loaf.
Two kneading blades work through the mixture, and heaters in the bottom and lid supply heat from both directions. Those are useful design differences for buyers comparing mixing and browning features, rather than counting menu choices.
Gluten-free mixtures still need enough liquid to combine properly. Two blades can't compensate for dry flour trapped in a corner or a recipe that uses the wrong blend.
The machine measures 18 inches wide and weighs 24 lb, so plan its location before buying. It makes more sense as an appliance you leave ready to use than one you lift out of a low cupboard every few days.
Choose it for regular batches and a dedicated baking spot. Skip it for frequent small batches if a recipe matched to its capacity would leave you with more bread than you want to store.
Its rapid white and whole-wheat courses aren't shortcuts for gluten-free recipes. Use the course your recipe calls for, and consult our guide to the best flour for a bread machine before choosing ingredients.
3. Elite Gourmet 2 lb (Black) for smaller counters
Elite Gourmet 2 lb (Black): Best for smaller counters
- Gluten-free program
- 19 one-touch programs
- Three loaf sizes
- 15-hour delay timer
Its smaller footprint suits kitchens where counter width matters. Smaller loaf options also help households avoid baking more bread than they need.
Pros
- Gluten-free program
- Three loaf sizes
- Programs for dough, cake and jam
Cons
- Nearly 14 inches tall before opening the lid
- Buyers wanting automatic mix-ins should choose another model
The Elite Gourmet fits buyers who need to keep counter width under control while retaining smaller loaf options. Its body measures 9.45 inches deep by 11.89 inches wide, with settings for 1 lb, 1.5 lb and 2 lb loaves.
Check height as carefully as footprint. At 13.98 inches tall, it needs additional clearance to open the lid and lift out a hot pan without hitting a cabinet.
Its 19 one-touch programs include gluten-free bread, dough, cake and jam. That variety suits a kitchen where the machine will earn its space through several uses, although those extra menus don't improve a gluten-free recipe by themselves.
The 15-hour delay timer can help with suitable recipes, but avoid delayed starts with perishable ingredients. Many gluten-free loaves contain eggs or milk, so immediate baking is the better plan for those recipes.
Choose this machine if a smaller footprint and batch flexibility matter more than an automatic dispenser. Skip it if your available space is a low shelf or enclosed appliance cubby.
Its nonstick pan also deserves gentle care. For help separating coating terms from practical buying concerns, read what to check about bread machine pan coatings.
4. KBS Premium Convection 2.2 lb for sandwich bread
KBS Premium Convection 2.2 lb: Best for sandwich loaf households
- Dedicated gluten-free program
- Dual heaters and convection baking
- Horizontal ceramic pan
- Automatic nut dispenser
The horizontal ceramic pan makes a rectangular loaf for households that favor sandwich bread. Dual heaters and convection are its main reasons to choose it over the KBS Pro.
Pros
- Dedicated gluten-free program
- Rectangular loaf shape
- Automatic dispenser
Cons
- 14.7 lb weight matters for storage
- Loaf shape alone doesn't determine slice size
The KBS Premium Convection suits households that want a rectangular loaf from a horizontal ceramic pan. That shape is a useful reason to consider it if sandwiches are your main use for homemade bread.
It combines dual heaters with convection baking and a dedicated gluten-free program. Its general loaf settings run from 1 lb to 2.2 lb, giving you several recipe sizes to consider within the course instructions.
The automatic dispenser is useful for recipes that call for nuts or other additions at the appropriate stage. Don't put essential flour, yeast or binders in it unless the recipe specifically directs you to do so.
Both KBS models include convection and a dispenser. Choose this Premium model for its heater arrangement and horizontal pan; choose the Pro when adjustable baking time and temperature are your main reason for buying.
Skip it if loaf shape isn't a priority and you'd rather focus on recipe controls. A rectangular pan also doesn't guarantee a particular slice height, since the recipe and amount of mixture determine how full the loaf becomes.
At 14.7 lb, it needs a storage plan you can manage comfortably. Leave enough room beside it for a cooling rack and a safe place to set the hot pan.
5. Hamilton Beach Digital Bread Maker for nearby bakers
Hamilton Beach Digital Bread Maker: Best for nearby bakers
- Gluten-free setting
- Three loaf sizes
- Add-in reminder beep
- PFAS-free nonstick pan and paddle
Choose this machine if you'll be nearby to respond to its add-in reminder. The countdown display helps you plan when to return for the finished loaf.
Pros
- Gluten-free setting
- Three loaf sizes
- Countdown display and add-in reminder
Cons
- Mix-ins need manual addition
- General add-in timing may not suit every gluten-free recipe
The Hamilton Beach suits buyers who expect to be in the kitchen during baking and prefer to add extras themselves. Its reminder beep provides a cue before the second kneading cycle.
That timing must still match your gluten-free recipe. Don't assume a general add-in signal means every course follows the same sequence or that delicate additions belong at that exact moment.
The machine offers general loaf settings of 1 lb, 1.5 lb and 2 lb. Its countdown display helps you plan when to return, which is useful when bread needs time to cool before lunch or dinner.
The pan and paddle have a PFAS-free nonstick coating. Choose that feature as a coating preference, while keeping ingredient choice and wheat residue separate from the coating decision.
Buy it if you want a gluten-free setting, a visible countdown and manual control over additions. Skip it if automatic dispensing is essential, since a reminder still requires you to be nearby.
Before your first loaf, read our guide to bread machine ingredient order. Follow this machine's instructions and your chosen recipe rather than assuming every bread maker uses the same loading order.
How should you choose a gluten-free bread machine?
Choose a machine that supports a recipe you can repeat, fits your available space and makes a manageable amount of bread. Use extra programs and accessories to break a tie after those needs are covered.
Start with the recipe and cycle
A gluten-free course gives you a cycle intended for this type of bread. Gluten-free mixtures often resemble thick batter or soft paste, and they don't develop the stretchy structure of wheat dough.
That changes what useful mixing and rising look like. A familiar wheat cycle with repeated kneading stages isn't a substitute for following gluten-free instructions.
Before buying, check whether the manual provides a gluten-free recipe and explains which controls work on that course. Our guide to how to choose a bread maker can help you weigh those needs against other uses.
Match capacity to your eating habits
Choose a batch you can eat or freeze while it's fresh. A larger loaf isn't better value if much of it goes stale before you finish it.
Loaf-size buttons don't resize a recipe for you. Use a formula written for the intended batch, since changing quantities can affect mixing, rise height and the bake.
For a single-person household, freezer space may matter as much as the smallest advertised setting. Sliced bread is easier to portion than a whole frozen loaf.
Measure the working space
Measure width, depth and lid clearance where the machine will run. Also allow room to lift the pan straight out with oven gloves.
Use a stable surface with the ventilation clearance required by the manual. Don't plan to operate the machine inside a closed cupboard, even if it fits there for storage.
Think about access as well as size. If moving the appliance is difficult, a convenient permanent location may matter more than an extra menu option.
Decide which conveniences you'll use
Automatic dispensers suit recipes with frequent mix-ins, while a reminder works if you'll be nearby. For plain sandwich bread, neither feature should dominate the decision.
Custom baking controls suit careful recipe adjustments. A timer helps with scheduling, but its usefulness depends on whether the ingredients can safely wait before the cycle starts.
Which flour and ingredients work for gluten-free machine bread?
Use the flour blend and binders specified by a gluten-free bread-machine recipe. Replacing wheat flour with an equal amount of any gluten-free flour rarely preserves the same structure or liquid balance.
Gluten-free bread needs a way to hold the gas produced by yeast. Recipes may use xanthan gum, psyllium or another binder, and those ingredients aren't freely interchangeable.
Check whether your flour blend already includes a binder before adding more. An extra spoonful can change the texture enough to make a loaf gummy or heavy.
Single flours also behave differently from blends. Rice flour, almond flour and coconut flour can't replace one another in equal amounts without changing the recipe.
Use weight measurements when the recipe provides them. Scooping flour into a cup can pack in more than intended, leaving the mixture too dry even when the liquid was measured correctly.
Keep yeast type, ingredient temperature and mixing instructions consistent for your first few loaves. Once the basic recipe works, change one ingredient at a time and record the amount.
Wheat-free and gluten-free aren't always the same thing. If you need to avoid gluten strictly, check all ingredients, including oats, flavorings and mix-ins, rather than checking only the main flour bag.
How do you set up your first gluten-free loaf?
Start with a plain recipe, an immediate cycle and time to watch the early mixing. Save delayed starts, flour substitutions and extra seeds for later batches.
- Read the machine's first-use instructions. Remove packaging and clean the removable food-contact parts as directed before assembling the machine.
- Fit the paddle securely. An overlooked paddle can leave you with an unmixed pan of ingredients.
- Measure everything before loading. Check the recipe's loaf size and make sure you haven't doubled a binder already included in the blend.
- Follow the required ingredient order. Don't copy another brand's method when your manual or machine-specific recipe gives different directions.
- Select the gluten-free course. Confirm any available loaf and crust choices before pressing start.
- Check early mixing if the manual permits it. Look for dry pockets, then close the lid for the rest of the cycle.
If scraping is needed, follow the manual and use a suitable silicone spatula while the machine is paused or stopped as directed. Keep fingers and utensils clear of a moving paddle.
Gluten-free mixture doesn't need to form the smooth ball expected from wheat dough. Don't keep adding flour just to make it look familiar.
If you need help learning the basic sequence, our beginner bread machine recipes explain the workflow. Use a specifically gluten-free formula for this loaf.
Plan for cooling time after the program ends. The countdown shows when baking finishes, not when the bread is ready for clean sandwich slices.
What common mistakes spoil gluten-free machine bread?
The biggest mistakes are changing the recipe too soon, misreading the mixture and judging the loaf while warm. Diagnose one problem at a time so the next batch teaches you something useful.
Adding flour until the mixture forms a ball
A soft or sticky mixture can be correct for gluten-free bread. Extra flour may prevent full hydration and leave a dense loaf with dry areas.
Use the texture guidance in the recipe. If it provides none, start with a recipe that does before adjusting liquid or flour by eye.
Choosing a faster cycle
A quick white-bread course isn't automatically suitable for gluten-free dough. Shortening the schedule can change both rise and bake time.
Keep the intended course while learning a recipe. Speed is a poor trade if the center remains damp or the loaf doesn't hold its shape.
Adding too many extras
Seeds, nuts and dried fruit change more than flavor. They add weight, and some absorb moisture that the base recipe needs.
Begin with the amount specified in a gluten-free recipe. Learn how the plain loaf behaves before building a heavily seeded version.
Slicing before the crumb sets
Warm gluten-free bread can feel sticky and tear under the knife. Let it cool fully on a rack before deciding that the recipe needs less liquid.
Use a serrated knife and gentle strokes once cool. Cutting while hot can compress the crumb and make a properly baked loaf seem gummy.
Changing several things after one poor loaf
A collapsed top or dense center can have more than one cause. Check measurements, yeast, flour choice and the selected cycle before changing the formula.
Keep a short note of the recipe, blend, cycle and cooled result. Adjusting one variable makes it easier to identify what helped.
How do you clean and store a gluten-free bread machine?
Clean the pan, paddle and crumb-catching areas after each bake, following the model's care instructions. Gluten-free programs don't remove flour or crumbs left from earlier use.
Let the machine cool and unplug it before cleaning. Remove loose crumbs, then wash removable parts only by methods allowed in the manual.
Don't immerse the machine body. Wipe it as directed, and keep water away from its electrical parts and controls.
Pay attention to the paddle shaft, underside of the blade and any dispenser. Dried mixture can collect in small gaps, making the next cleanup harder.
Avoid metal tools and harsh scouring pads on coated surfaces. If the paddle sticks, follow the manual's soaking guidance rather than prying against the pan.
If a paddle becomes damaged or goes missing, our guide to bread maker paddle replacement explains what to match. A blade that merely looks similar may not fit the shaft correctly.
For strict gluten avoidance, dedicated equipment is the simpler way to reduce shared-equipment residue. Keep measuring tools, cooling racks, knives and the preparation area in mind as well as the machine.
Once the bread is fully cool, slice and freeze portions you won't use soon. Don't bag it while warm, since trapped moisture can leave the crust and surface damp.
Which bread machine should you buy for gluten-free bread?
The best bread machine for gluten free bread is the one whose controls, batch size and working space match your routine. Choose your machine first, then build consistency with one suitable recipe.
Pick the KBS Pro if you want to refine baking time and temperature. Choose the Zojirushi Virtuoso Plus if regular family batches and a permanent counter spot suit your kitchen.
Choose the Elite Gourmet when counter width and smaller batch options matter most. Pick the KBS Premium Convection when a horizontal ceramic pan and rectangular loaves are your priorities.
Choose the Hamilton Beach if you'll be nearby for manual additions and want a clear countdown. Its reminder is useful when it fits the recipe's timing.
Before ordering, confirm that your intended recipe fits the gluten-free course and pan capacity. For broader options beyond this shortlist, see our guide to the best bread makers.
Related guides: Can You Make Gluten-Free Bread in a Bread Machine? · Best Bread Makers · Best Bread Machines for Beginners · What to Check About Bread Machine Pan Coatings
Our top 3 picks at a glance
-
1
-
2
-
3
Frequently asked questions
Do bread machines make good gluten-free bread?
A bread machine can make good gluten-free bread when the recipe, flour blend and cycle work together. Start with a gluten-free bread-machine recipe matched to the pan capacity, measure carefully, and let the loaf cool before judging its crumb.
A dedicated cycle helps, but it can't correct an unsuitable recipe.
Does a gluten-free bread machine need a special pan?
No special pan coating is required for gluten-free bread. Ceramic and other nonstick pans can both work, provided the ingredients and equipment stay free of wheat residue.
For a shared machine, pay close attention to the paddle, shaft, pan seams and any dispenser where flour or crumbs can remain.
Can I use regular bread recipes in a gluten-free cycle?
Use a gluten-free bread-machine recipe rather than putting a wheat recipe through a different cycle. Removing wheat changes how the loaf holds gas and moisture, so flour, liquid and binders need to work together.
Follow the recipe's blend and loaf-size guidance before making changes of your own.
What loaf size should I choose for gluten-free bread?
Choose the loaf size specified by your recipe, then consider how much bread you'll eat or freeze. A machine's capacity is a limit, not a target you must fill.
Don't assume its smallest size setting is available on every course; check the gluten-free instructions before planning smaller batches.
Why is my gluten-free bread gummy in the middle?
A gummy center can come from excess liquid, an unsuitable flour swap, incomplete baking or slicing while the loaf is warm. Let it cool fully before assessing the crumb.
If the problem remains, repeat the recipe with careful measurements and change one variable at a time.