5 Best Bread Machines Under $100 (October 2026)
The best bread makers under 100 dollars include the Elite Gourmet 2 lb (Black) for everyday family baking, the Elite Gourmet PFAS-Free 2 lb for ceramic-pan shoppers, and the Amazon Basics 2 lb Bread Maker for occasional quick loaves.
On this page (8 sections)
- How we chose bread makers under 100 dollars
- The best bread machines under 100 dollars
- How do you choose a bread maker under 100 dollars?
- How should you set up a budget bread machine?
- Which mistakes cause disappointing bread machine loaves?
- How do you clean and care for a bread maker?
- FAQ about bread makers under 100 dollars
- Which bread maker under 100 dollars should you buy?
The Elite Gourmet 2 lb (Black) is our top bread maker under 100 dollars for households that want flexible loaf sizes and everyday bread programs. Choose the ceramic Elite Gourmet for its pan coating, Amazon Basics for occasional express baking, Rosewill for varied presets, or KITCHENARM for recipe adjustments.
Start with the bread you'll make each week, then choose the machine that handles it with the fewest extra steps. Our complete bread machine buying guide explains the category, while our bread machine buying guide by loaf size, paddles and presets helps narrow the features.
Our picks at a glance
-
1

-
2

-
3

- 4
 Best for varied recipe routinesCheck it
- 5
 Check it
KITCHENARM 19-in-1 Bread Machine
Best for recipe experimenters
How we chose bread makers under 100 dollars
Useful loaf sizes, suitable cycles and pan care drove these picks. We compared those features with scheduling options and the extra control each machine gives a home baker.
A household making sandwich bread needs a suitable loaf size more than a yogurt preset. Someone adapting recipes has a stronger reason to choose adjustable cycle times, even if that machine sits lower in the overall ranking.
Pan coatings also create a clear buying choice, so we've separated ceramic-coated parts from other non-stick options. A coating preference can matter more to your decision than a small difference in score.
Check that your chosen model fits your spending cap before ordering. For options beyond this budget, see our guide to the best bread makers.
| Product | Best for | Loaf sizes | Programs | Pan | Our score |
|---|---|---|---|---|---|
| Elite Gourmet 2 lb (Black) | everyday family baking | 1 lb, 1.5 lb, 2 lb | 19 | Non-stick | 8.4 |
| Elite Gourmet PFAS-Free 2 lb | ceramic-pan shoppers | 1 lb, 1.5 lb, 2 lb | 19 | PFAS-free ceramic-coated | 7.6 |
| Amazon Basics 2 lb Bread Maker | occasional quick loaves | Up to 2 lb | 14 | Non-stick | 7.3 |
| Rosewill 25-in-1 2 lb | varied recipe routines | 3 sizes, up to 2 lb | 25 | PFAS-free and BPA-free non-stick coating | 6.8 |
| KITCHENARM 19-in-1 Bread Machine | recipe experimenters | 1 lb, 1.5 lb, 2 lb | 19 | Teflon-coated non-stick | 6.5 |
The best bread machines under 100 dollars
The black Elite Gourmet is the broadest everyday choice, but each alternative solves a different need. The product sections below explain who should buy each machine and who should choose another.
Elite Gourmet 2 lb (Black): Best for everyday family baking
- 1 lb, 1.5 lb and 2 lb loaf sizes
- 19 programs
- 15-hour delay timer
- 60-minute keep warm
Choose this model if your household needs different loaf sizes through the week. Its bread and dough programs cover everyday baking without requiring custom cycle timing.
Pros
- Three loaf sizes for changing household needs
- Dedicated gluten-free and pizza dough programs
- Delay timer and keep warm
Cons
- Does not offer the ceramic-coated baking parts of the other Elite Gourmet
The Elite Gourmet 2 lb (Black) suits a household whose bread needs change through the week. Choose a 1 lb loaf for lighter use, 1.5 lb for a middle option, or 2 lb when you need more slices.
Its 19 programs include white, wheat, rye, French and sweet breads, plus gluten-free bread, pizza dough, cake and jam. That mix suits someone who wants sandwich bread most days and dough for a weekend meal.
The 15-hour delay timer helps with planned baking, while the 60-minute keep-warm function gives you some room at serving time. Light, medium and dark crust choices let you adjust browning without changing the recipe.
Buy this one for regular baking with occasional variety. Our beginner bread machine picks offer more comparisons if you're choosing your first machine.
Skip it if ceramic-coated baking parts are a firm requirement. The next Elite Gourmet makes that choice clearer without giving up the same loaf-size range.
Elite Gourmet PFAS-Free 2 lb: Best for ceramic-pan shoppers
- PFAS-free ceramic-coated pan and kneading blade
- 1 lb, 1.5 lb and 2 lb loaf sizes
- 19 programs
- 15-hour delay timer
Pick this Elite Gourmet when ceramic-coated baking parts are a firm requirement. It keeps the loaf-size choices and automatic operation useful for regular bread making.
Pros
- PFAS-free ceramic-coated pan and kneading blade
- Three loaf sizes
- Programs include rice bread and yogurt
Cons
- Ceramic coating still requires careful handling
The Elite Gourmet PFAS-Free 2 lb suits buyers who want ceramic-coated food-contact parts. Both its CERALAST pan and kneading blade have a PFAS-free ceramic coating, making this the direct choice for that preference.
Its everyday controls closely match the black model, with the same size range, program count, crust choices and delay window. You don't need to give up flexible loaf sizing to choose the different coating.
Rice bread and yogurt are among its menu options, alongside familiar bread and dough cycles. Buy it for the pan first, then treat those extra programs as useful additions if they match your cooking.
Ceramic coating still needs gentle care, so avoid metal scraping and abrasive cleaning tools. Our guide to bread maker pans and what to check explains coating terms in more detail.
Skip this model if you mainly want to change individual cycle times. Pan material is its reason to choose it, rather than added control over the bread-making schedule.
Amazon Basics 2 lb Bread Maker: Best for occasional quick loaves
- Up to 2 lb loaf
- 14 settings
- ExpressBake setting
- Three crust colors
Choose Amazon Basics if you want common bread and dough settings plus an express option. Its shorter menu suits buyers who have little use for extra specialty presets.
Pros
- ExpressBake setting
- Light, medium and dark crust choices
- Includes dough and gluten-free settings
Cons
- Fewer specialty settings than the other picks
- Express cycles need recipes suited to the shorter schedule
The Amazon Basics 2 lb Bread Maker suits occasional bakers who want common cycles and an express option. Its 14 settings cover breads, doughs, gluten-free options and jams, with an LCD display for selecting the program.
Amazon Basics says ExpressBake makes bread in less than 90 minutes. Use a recipe written for that setting, since a shorter cycle changes how much time the dough has to develop and rise.
The machine handles loaves up to 2 lb and offers 3 crust colors. Confirm the recipe sizes supported in its manual if small loaves are central to your plans, rather than assuming every capacity has a matching control.
Choose it if you expect to repeat a few recipes and occasionally need a quicker loaf. Skip it if custom timing or a named ceramic coating is on your must-have list.
Our bread machine buying guide can help you decide whether those extra features would earn their space in your kitchen.
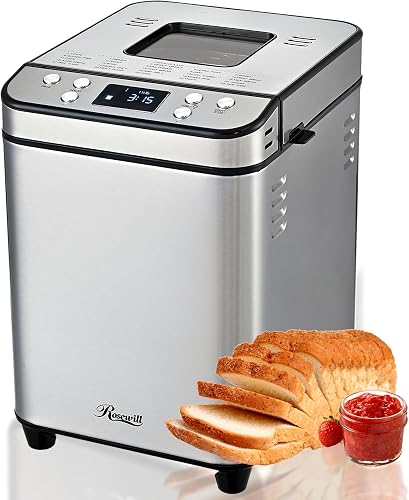
Rosewill 25-in-1 2 lb: Best for varied recipe routines
- 25 programs
- Three loaf sizes up to 2 lb
- Three crust colors
- 15-hour delay timer
Rosewill suits households that will use bread, cake, yogurt and jam presets. Its broad menu is most useful when several of those recipes already fit your routine.
Pros
- Broadest preset menu in this group
- Top and bottom heaters
- Delay start and 1-hour keep warm
Cons
- Hand-wash-only care
- Extra presets add little value for basic-loaf-only buyers
The Rosewill 25-in-1 2 lb suits a household that will use several kinds of automatic recipes. Its 25 programs include gluten-free bread, cake, yogurt and jam, so the extra choices make sense for more than sandwich loaves.
It offers 3 loaf sizes up to 2 lb, crust control and a 15-hour delay start. The 1-hour keep-warm function gives you time to finish another task before removing the loaf.
Rosewill uses 700-watt top and bottom heaters, and its non-stick pan coating is PFAS-free and BPA-free. Heater placement is a design feature, but the recipe and ingredient measurements still matter to the finished loaf.
Buy it if the specialty presets match meals you already make. Skip it if you'll use only basic bread and dough, since most of the larger menu would sit unused.
The pan is hand-wash only. Plan to clean it gently after each batch rather than choosing this model around dishwasher convenience.
KITCHENARM 19-in-1 Bread Machine: Best for recipe experimenters
- 19 menus including a programmable HOME MADE menu
- 1 lb, 1.5 lb and 2 lb loaf sizes
- 57 included recipes
- 15-hour delay timer
Choose KITCHENARM if you want to adjust kneading, resting, rising and baking times. Its saved settings also suit bakers who repeat a favorite recipe.
Pros
- Programmable HOME MADE menu
- Saves menu, loaf-size and crust settings
- Includes 57 recipes and two paddles
Cons
- Custom timing takes more learning than selecting a preset
- Teflon-coated pan will not suit shoppers avoiding that coating
The KITCHENARM 19-in-1 Bread Machine suits bakers who want control over the stages of a recipe. Its HOME MADE menu lets you set kneading, resting, rising and baking times instead of relying only on fixed presets.
That matters when a recipe needs a different rise schedule or you're learning how timing changes a loaf. Begin with the included recipes before changing cycle lengths, so you have a useful starting point.
The recipe book contains 57 recipes, and the machine saves your menu, loaf-size and crust choices for the next use. Add-nuts and remove-paddle alarms also help with steps that require your attention.
Choose this machine if you enjoy making small, recorded adjustments. Skip it if you want ceramic-coated parts or know you'll never use the extra timing controls, since its pan is Teflon-coated non-stick.
Follow our guide to bread machine ingredient order when learning the loading process, then follow the instructions for your chosen recipe.
How do you choose a bread maker under 100 dollars?
Choose around your usual loaf, the cycles it needs and a pan you'll care for properly. Extra presets are useful only when they support recipes you plan to make.
Which loaf size fits a bread maker under 100 dollars?
Choose a loaf size you can finish while the bread still suits your meals. A larger machine can offer flexibility, but a large loaf isn't automatically better value if much of it goes stale.
The black Elite Gourmet, ceramic Elite Gourmet and KITCHENARM each offer the same clearly named small, medium and large loaf options. Rosewill also has 3 sizes, while Amazon Basics specifies a maximum capacity.
Think about slices and eating habits rather than household size alone. Someone packing sandwiches every day may use more bread than a larger household that eats toast only on weekends.
Follow a recipe written for the selected loaf setting. Halving an oversized recipe without guidance can change mixing and baking behavior, and filling the pan beyond its limit risks overflow.
Which programs will you actually use?
Basic bread and dough cycles cover many routines. Add whole wheat or gluten-free to your required features if those are the breads you intend to make, rather than treating them as occasional extras.
A dough cycle also makes a machine useful when you prefer rolls, pizza or an oven-baked loaf. The appliance handles the mixing and initial dough work, while you handle shaping and the final bake.
For a practical next meal, follow our bread machine pizza dough recipe. Choose a batch size that fits your machine and allow time for shaping and baking afterward.
A sourdough button deserves closer reading before it drives your choice. Follow the recipe's yeast or starter requirements rather than assuming the cycle suits any starter-based dough.
Which pan coating should you choose?
Choose ceramic-coated parts if that material is a firm preference, and compare the coating on the paddle as well as the pan. The ceramic Elite Gourmet names both parts, while Rosewill specifies a PFAS-free and BPA-free non-stick pan coating.
A ceramic coating is still a coating, rather than a solid ceramic vessel. It needs gentle handling, and its name alone doesn't establish how long it will last.
With any coated pan, avoid knives and metal utensils inside it. Check the replacement-pan and paddle options before buying if you expect frequent use, since those are parts you'll handle after every loaf.
Will it fit where you'll bake?
Measure counter space, lid clearance and the route for lifting out a hot pan. The appliance's closed dimensions don't tell you whether it will be comfortable to use beneath a cabinet.
Leave the ventilation space required by the manual and use a stable, level surface. Keep the machine back from the counter edge, where kneading movement and a dangling cord create avoidable problems.
If you plan to store it between uses, think through the full routine. A machine you can lift easily onto a clear counter is more useful than one buried behind other appliances.
Do you need delayed baking or custom timing?
Choose a delay timer for scheduling and custom timing for changing the bread-making process. They're different tools: delaying the start doesn't give you control over each rise or kneading stage.
Use delayed cycles only with recipes and ingredients the manual allows. Don't leave milk, eggs or other ingredients that need refrigeration sitting in the pan for a long delay.
Keep warm is a short serving buffer, not a storage method. Remove the loaf when practical and cool it on a rack so trapped steam doesn't soften the crust.
How should you set up a budget bread machine?
Start with the manual's basic loaf and standard cycle. A simple first batch makes it easier to spot a measuring, ingredient or loading mistake before adding whole grains, fruit or custom timing.
Prepare the machine before adding ingredients
Remove packaging and wash the removable food-contact parts as the manual directs. Dry them, seat the paddle fully and check how the pan locks into place before filling it.
Keep the machine unplugged during preparation and don't immerse the base. If the manual calls for a first-use heating step, follow that process before making bread.
Measure and load with care
Use the recipe's measurement method, with a kitchen scale when weights are provided. Scooping flour straight from the bag can pack too much into a cup and leave the dough short of liquid.
Load ingredients in the order required by the machine and recipe. For a delayed start, follow the instructions for keeping yeast separate from liquid until mixing begins.
Keep flour and liquid out of the baking chamber when filling the pan. Refit the pan securely, then confirm the menu, loaf size and crust setting before pressing start.
Watch the first batch at the right stage
For a wheat loaf, check the dough during early kneading if the manual permits opening the lid. It should form a soft, cohesive mass rather than remain dry crumbs or a puddle.
Make only small corrections and give the machine time to mix them in. Gluten-free mixtures behave differently, so don't add flour merely because they don't form a wheat-style dough ball.
Avoid opening the lid during baking. Once finished, use oven mitts to remove the pan, release the loaf as directed and let it cool before slicing.
Which mistakes cause disappointing bread machine loaves?
Inaccurate measuring, the wrong recipe size and rushed slicing cause problems that a longer menu can't solve. Change one thing at a time so the next loaf tells you something useful.
Using any recipe with any cycle
Match the recipe to the machine's capacity and chosen program. A standard loaf recipe may need more rising time than an express cycle allows, while a quick bread follows a different process from yeast bread.
Use the yeast type and amount the recipe calls for. Adding more yeast to chase a taller loaf can lead to dough rising too far and then collapsing.
Swapping flour without adjusting the recipe
Choose flour for the loaf you're making, then keep it consistent while learning. Whole wheat, all-purpose and bread flour absorb liquid differently and don't always work as equal swaps.
Our guide to the best flour for a bread machine explains those choices. For a first loaf, following the manual's flour recommendation removes one variable.
Adding too much fruit, cheese or other extras
Keep additions within the recipe's quantities and add them at the instructed stage. Heavy extras can affect mixing, while wet ingredients change the dough's moisture.
Treat vegetable and fruit breads as full recipes rather than basic dough with a handful of leftovers added. Custom timing can't correct an unbalanced ingredient mix by itself.
Cutting the loaf while it's still hot
Let the loaf cool before cutting it into sandwich slices. The inside continues to set as it cools, so cutting too early can leave a compressed or gummy-looking crumb.
For a small household, slice and freeze the portion you won't use soon after the loaf has cooled fully. Toast slices as needed rather than making an oversized loaf just to leave it on the counter.
How do you clean and care for a bread maker?
Clean the removable parts gently and keep the base dry. Good care centers on protecting the pan coating, clearing dough from the paddle and preventing crumbs from building up around the baking chamber.
Unplug the machine and let it cool before cleaning. Follow the manual's instructions for each part instead of assuming that a care label applies to the entire appliance.
If dough sticks around the paddle, soften the residue as directed before trying to remove it. Don't pry with a knife or force a stuck paddle, since that can damage the coating or shaft area.
Use a soft cloth or sponge on coated surfaces, then dry the pan and paddle before storage. Avoid sudden temperature changes, such as putting a hot pan straight into cold water.
Inspect the coating and paddle fit during normal cleaning. If a part becomes damaged, ask the brand about a compatible replacement rather than scraping away the coating or fitting a paddle that only looks similar.
FAQ about bread makers under 100 dollars
Budget bread makers can handle more than basic white bread, but recipe choice still matters. These answers cover common uses that can affect which machine you choose.
Can you make pizza dough in a bread maker under 100 dollars?
Yes, both Elite Gourmet models have a pizza dough program, and the other machines include dough settings. Use a recipe within the machine's capacity and follow its instructions for the mixing cycle.
The machine prepares dough rather than a finished pizza, so leave time to shape, top and bake it separately.
Is a bread machine under 100 dollars suitable for daily use?
Yes, a budget machine can fit a daily baking routine when its loaf sizes, cycles and cleaning needs suit you. Plan around the time required to cool the machine between batches, following its manual.
For frequent use, check access to replacement pans and paddles before choosing, rather than judging durability from wattage or program count.
Do bread machines under 100 dollars include gluten-free settings?
All 5 picks here include a gluten-free program. Choose a recipe made for gluten-free bread machines and use the specified flour blend, since different blends can absorb liquid and hold structure differently.
Our guide to bread machines for gluten-free bread explains more features to consider for regular gluten-free baking.
Should beginners buy a bread machine with many programs?
Beginners can use a machine with many programs, but they only need a few suitable cycles to get started. Choose based on your usual bread and preferred controls rather than the largest menu.
Repeat a basic recipe until the process feels familiar, then add a new flour, specialty cycle or dough recipe one at a time.
Which bread maker under 100 dollars should you buy?
Choose the black Elite Gourmet for routine household baking, or the ceramic Elite Gourmet when its coating is a firm requirement. Pick Amazon Basics if an express option matters more than specialty presets.
Rosewill makes sense when you'll regularly use its wider recipe menu. Choose KITCHENARM when you want to adjust individual stages, and allow time to learn what each change does.
Before ordering a bread maker under 100 dollars, settle your usual loaf size and where the machine will sit. Then browse our best bread makers if your required feature points beyond this group.
Our top 3 picks at a glance
-
1
-
2
-
3
Frequently asked questions
Can you get a good bread maker under 100 dollars?
Yes, a bread maker under 100 dollars can handle automatic mixing, kneading, rising and baking. Choose around your usual loaf size, needed cycles and preferred pan coating rather than the longest menu.
Check that your chosen machine fits your budget before ordering, since availability and costs can change.
What features matter most in a budget bread machine?
Loaf-size choices, suitable bread programs and manageable pan care matter most. A delay timer helps when you need bread ready later, while custom cycle timing helps with recipe adjustments.
Measure your counter and lid clearance too, because a machine that is awkward to reach may get used less.
Are bread machines under 100 dollars good for beginners?
Yes, automatic cycles make budget bread machines useful for beginners. Start with a basic recipe from the machine's manual, measure carefully and keep the same flour and yeast while learning.
You don't need to use every preset, and a long menu is no reason to change several things between loaves.
Can a budget bread maker make gluten-free bread?
All 5 machines here include a gluten-free program. Use a recipe written for gluten-free bread machines, since wheat-bread substitutions can change the dough's structure and rise.
Our guide to bread machines for gluten-free bread explains which features to compare before choosing a machine for regular gluten-free baking.


